At this point I got the test circuit completely operational and the test software working good. Now it is time to start on the clock itself.
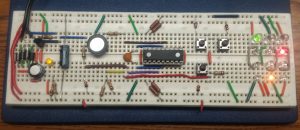
At this point I got the test circuit completely operational and the test software working good. Now it is time to start on the clock itself.
At this point, I’m able to operate the LEDs of the test circuit by manually applying +5V and ground to the four lines that will be connected to the I/O ports on the microcontroller. I can light any one of the 12 LEDs without having any of the other LEDs light up. This is pretty cool, the technique works!
Received parts. Now it’s time to breadboard the test circuit …
Selected components for the test circuit and ordered the parts. I ordered a number of different LEDs in each color and size to see what will work best.
I created a test schematic to run 12 LEDs, the buzzer and three pushbuttons and monitor the 60Hz frequency. The LEDs and pushbuttons will be interfaced with just four I/O lines of the microcontroller This will allow me to test the concepts that will enable me to make the full circuit consisting of 182 LEDs and four pushbuttons interfaced to 14 I/O lines. For both the test and final circuits, the buzzer and 60Hz will each have a dedicated I/O line. Six I/O lines for the test circuit, and 16 I/O lines for the final clock circuit.
My last semester of college is finally here, time to get to work on my Senior Project!
You must be logged in to post a comment.